As photographers and creatives, we have a deep interaction with the process of making a photograph. We view and interact with a scene or a moment with the intention of capturing that moment in a special and unique way. We use our cameras as a means to convey our experience. The process moves beyond just the camera and lens, it also lies in the editing of the image or series of images where we can further display the mood, light, colours, and more.
Back in 2013, I purchased my first Fujifilm X Series camera, the X100s. It was around this same time that I discovered Exposure. As someone who has always had a love of film, one the elements that drew me into Exposure was the multitude of film simulations within the program, early adoption of support Fujifilm RAW files and film simulations, and of course that it is a really awesome photo editor.
Every image I share on social media or post on my website is edited in some way. Perhaps there are just a few minor changes or black and white conversions. Through a program like Exposure, I can push further, create more, and also have fun along the way.
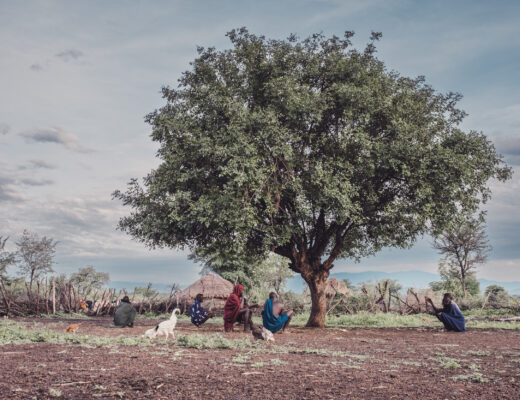
Over the years, I have dabbled in almost every genre of photography. Through this journey I’ve found that my two true loves are creating portraits and travelling; often times they blend together. For this article, I highlight images from a recent road trip from Seattle to Los Angeles. One of the true highlights for me was Mono Lake in California.
When it comes to workflow, with any session or trip, the process is always the same for me. In this article, I will share my essential steps, with a focus on how I use Exposure in conjunction with my Fujifilm RAF files.
Bookmark
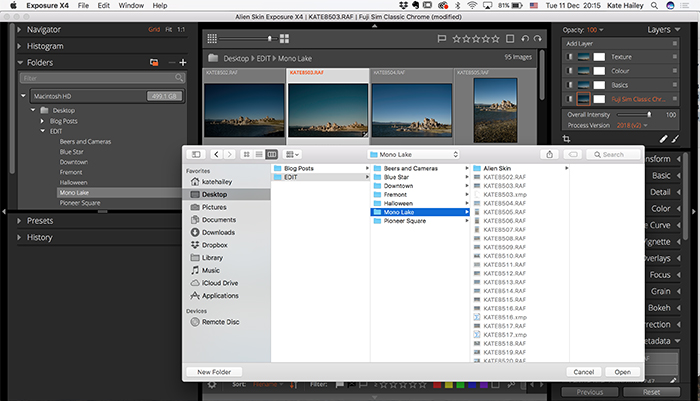
To kick things off, I open Exposure and add a bookmark to the folder that I want to work on. Typically that bookmark will be to a working folder on my desktop.
To bookmark a folder:
- Go to Folders
- Click the + Sign
- Navigate to the folder you want to bookmark
- Click Open
This will add the folder to the Folders List. These folders can live on your computer’s internal hard drive or external hard drives. Exposure will remember these bookmarks until you remove them.
After I’m done with the session, I will move the files to my external drives to ensure everything is backed up. More on that later.

Keywords
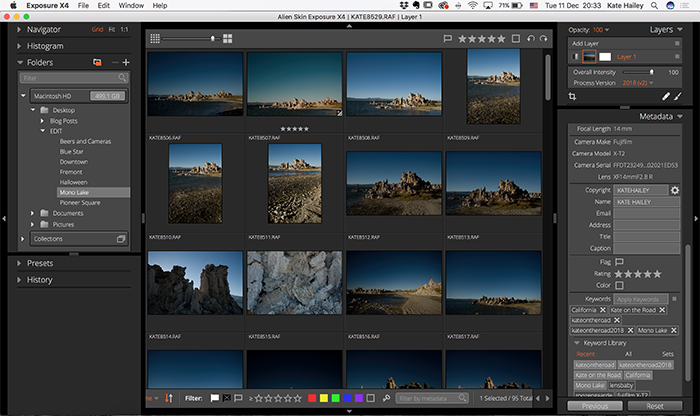
Once bookmarked, I will select all the images in the folder to add keywords to the images. In this instance, I added keywords like Mono Lake and California. If there is a blend of different types of images or places in one folder, I can select certain ones and just assign keywords to those. Keywords come in handy when you want to find something down the line, which is something I find myself doing quite often.
To add Keywords:
- Select images that you want to apply keywords to
- Go to the Metadata panel on the right side of Exposure
- Enter keywords into the Keywords field
If you have already used Keywords, you will see some options already listed. You can click on those to add them to the selected images.
Reviewing and Rating
The culling process is key to narrowing down the hundreds (or thousands) of images to get to the best images. My thoughts are that it’s best to edit only a handful of images, no need to edit everything if they aren’t all winners. I use the 1 – 5 stars to rate images, a 1 is on the low end, 5 is a winner. I do at least two passes, quickly reviewing and going with my gut to do the first pass. Once I’ve done that, I will use the filtering tools to just view the 5 star images.
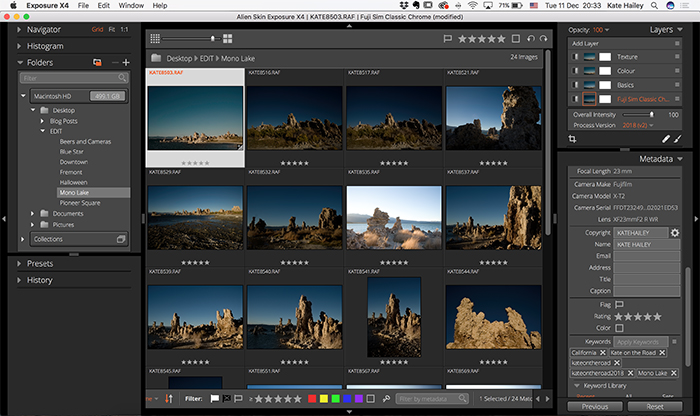
Overall, I have 95 images captured at Mono Lake. When I narrow down to the 5 Star images, I’m down to 24. That’s really still too many to think about editing. By clicking on the Stars along the bottom I can narrow the view from the original 95 in the folder to 24.
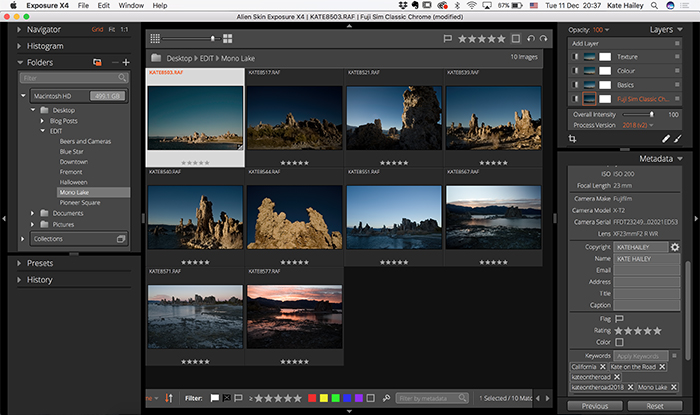
This is where I dig in and do in-depth comparisons to really narrow things down. This more intensive review process is always done at least at the “Fit” option to fill the screen with the image. Once I’m done with this pass, I’m now down to 10 images. These 10 will be the best options to work on.
This is where the real fun begins!
You may look at these screenshots and think at least one or two of these images may be too dark. I can see that, on at least one, but know that with the dynamic range of the Fujifilm X-T2, I can pull things out of the shadows a bit to brighten them up.

Editing the Work
For each image, I begin with a Preset. For colour images, my go-to is often the Classic Chrome simulation, as I love the shift in blues and the bit of contrast that it adds. If I’m in the mood for Black and White, Acros is always number one. If you find you start to develop favourites, simply hover over the top right corner of the preset and you can click on the star to add it to your “Favorites” under the Presets Panel.
For this first image from Mono Lake, I chose the Classic Chrome Sim Preset. Once you’ve selected a preset, you will see it listed in the Layers panel, as the base layer. If you like the preset as is, you can continue on to other editing tools, or if you want to soften the effect of the preset, you can use the Opacity slider to reduce that effect. The opacity slider is just below the layers list.
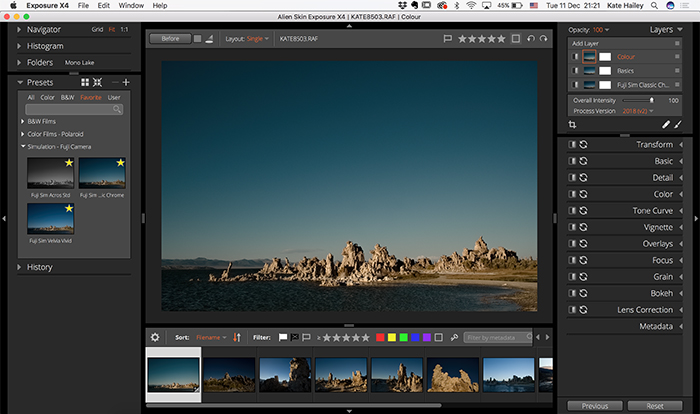
Working in Layers
One of my techniques for editing in Exposure is to work in layers. If you’re using Photoshop, this will seem familiar. What I really love about this is the option to build on the preset, and really see what is happening as I make adjustments.
In this example, my base layer is the Fujifilm Sim Classic Chrome. Then above that, I work in sections. Typically after I apply a Preset, I will go to the Basic panel to do essentials edits. From the Basic Panel, I spend some time in the Colour panel. Then, depending on the mood I’m going for, I will dig into Grain or Overlays, like textures.
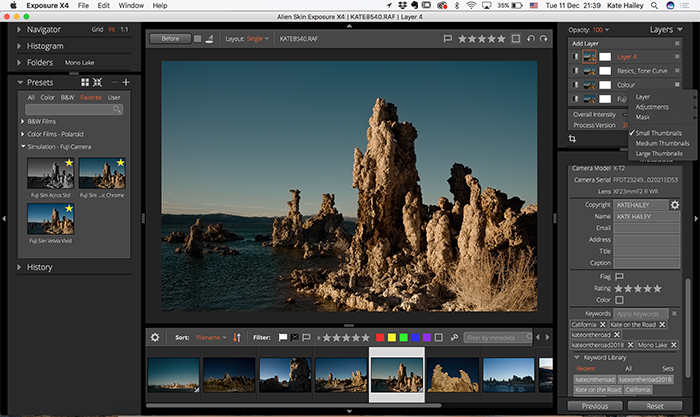
For this particular image, I worked with Basics first, as a layer, then worked on the Colour panel in a separate layer. You can do all of these elements in a single layer, if you like, of course! I prefer to work in these small sections via layers, because I can easily go back in and just tweak those elements. Labelling them helps me remember what I did where.

Basic Adjustments – Exposure, Shadows, & Blacks

Colour adjustments on the Colour Layer
To rename a layer, double click on the layer name and enter a new name. It’s important to name them in ways that work for you. If you click on the icon to the right on any layer, there’s a submenu. Through this submenu you can copy layers, delete, rename, reset, etc., as well change the size of the thumbnails and much more.
You could also choose to start with the Basics panel, or anywhere you want to, I often go with a preset first. This is because a preset may often affect elements like exposure, shadows and highlights.

Mono Lake, CA – Fujifilm X-T2 w/ 23mm f/2 Lens | Exposure Fujifilm Acros Sim
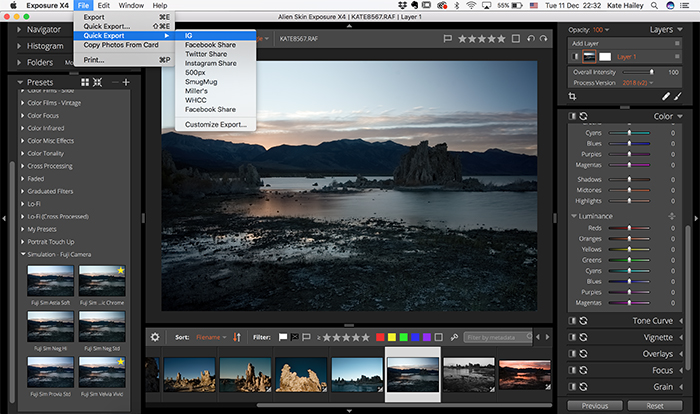
Exporting
Once I have cycled through my images and completed my edits, I will then export the images to share on social channels or my blog.
To Export your images:
- Select the Image(s) you want to export
- Click Export in the top menu bar
- This brings up your options for export
I will typically create a folder on my desktop, or add to an existing folder, if I already have one for Instagram. I will always resize to dimensions that are best suited for what I’m going to do. For my blog I tend to go with 1000px wide, for Instagram I go with 1200px wide, even though they resize down.
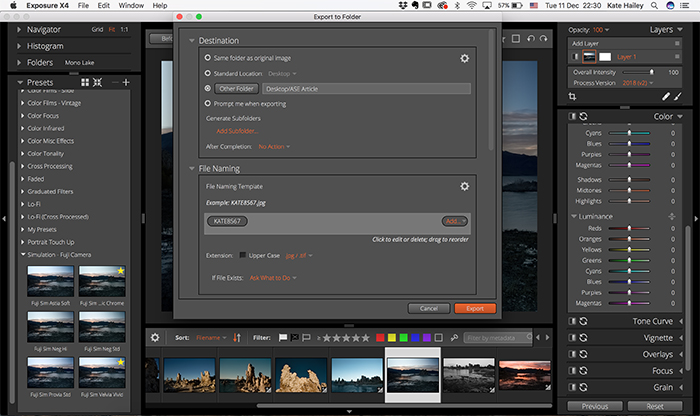
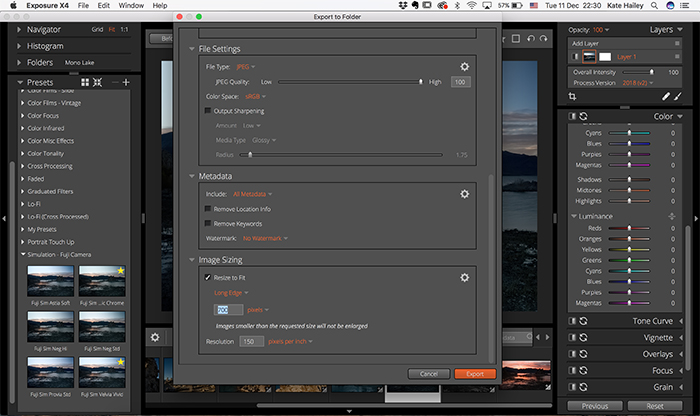
You can also use one of Exposure’s Quick Export presets or make your own. They’ve pre-made export presets for Instagram, Facebook, 500px, and even SmugMug and labs like WHCC or Miller’s.

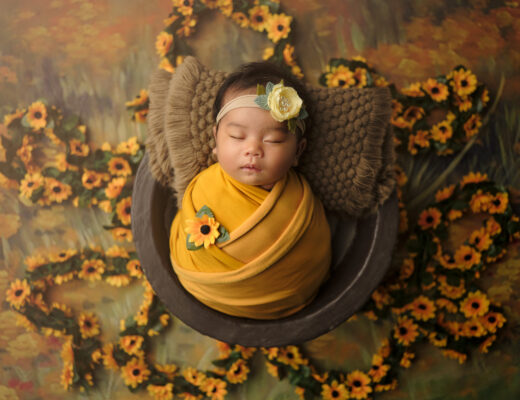
Mono Lake, CA – Fujifilm X-T2 w/ 23mm f/2 Lens | Exposure Fujifilm Classic Chrome Sim
Backing Up!
Backing up your work is so very important in this digital age. Hard drives fail. Once I am finished with editing a session or a series from a trip, I will copy the parent folder from my computer to a pair of external hard drives. You want to have your images backed up on at least two separate drives and ideally a third location, perhaps an online cloud service, or a third drive that’s kept off-site.
Within your image folder, you will see a folder labeled Alien Skin. This folder contains the metadata for your edits. As long as that folder and the .xmp files are always paired up with the images, your edits will be available. If you’re familiar with Lightroom, Lightroom has a catalogue which is keeping up with those details. These catalogues can get big, take up room on your computer and sometimes, over time, run slowly. Exposure works a bit differently, avoiding some of those potential slow downs. Which is another reason I love this program!

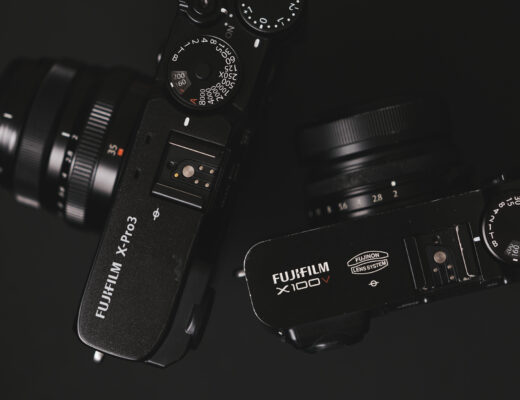
Mono Lake, CA – Fujifilm X-T2 w/ 23mm f/2 Lens | Exposure Fujifilm Velvia Sim
Wrapping Up
Over the years, I’ve grown to love Exposure more and more, especially with their more recent updates, adding layers, keywords, and of course their continued support of Fujifilm RAW files.
All of the images in this article were captured on the Fujifilm X-T2 with the 35mm f/2 lens at Mono Lake, in California. All edits were done with Exposure X4.
Disclaimer: This article has been sponsored by Alien Skin Software, makers of Exposure X4, non-destructive RAW photo editor and organizer. Alien Skin Software is a FujiLove Partner and we would like to thank them very much for their support.